The VGIS Desktop platform allows you to manage calls and activities for your productivity tools in the VBC Desktop App.
Supported productivity tools include Salesforce, G-Suite, SugerCRM, and Office 365 (Microsoft 365).
VGIS Administrators: To manage your users and integration settings account-wide, see the Config Portal. To add licenses for productivity tools, see VGIS Setup.
Access Your Productivity Tool
All users access their productivity tools in the same manner.
| Sign In |
- Sign in to the Desktop App.
- Go to My Apps (left panel) and click your productivity tool.
- Sign in to your productivity tool with your credentials for that tool.
|
Sign Out /
Unlink CRM Profile |
- Go to My Apps (left panel) and click your productivity tool.
- Click on your user name and click Unlink CRM Profile.
|
Manage Calls, Contacts, and Activities
Make and Receive Calls
| Place a Call |
| Dialer |
- Click Dialer icon (bottom left).
- Enter the phone number, then click the green Phone icon. The In-Call screen is displayed.
- Click the red Phone icon to end a call.
| | + New |
- Click + New icon (top left), then choose New Call.
- Enter the phone number, then click the green Phone icon. The In-Call screen is displayed.
- Click the red Phone icon to end a call.
| | Calls (Call History) |
- Hover over the phone number, then click the Phone icon. The In-Call screen is displayed.
- Click the red Phone icon to end a call.
|
|
| Receive a Call |
- Shows caller information (first and last name) and other details if known.
- Click Mute and Minimize Call to ignore.
- Click green Phone icon to answer. In-Call screen is displayed.
- Click the red Phone icon to hang up an active call.
|
Manage Contacts
A contact sync runs every night automatically (at approximately 12:00 AM EST) which updates contact information, whether added, updated, or removed. To view contacts:
- Sign in to the Desktop App.
- Click Avatar (Top left) and then Settings.
- Select Application, then Contacts.
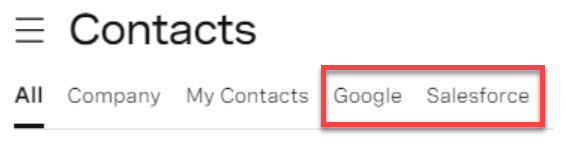
- Go to Show contacts from and select applicable integrations; the selected integrations are then visible under Contacts.
Here is an example with Google and Salesforce:
Manage Activities
| Create / Update Activity |
| In-Call |
- Click My Apps (upper left).
- Click on your productivity tool.
- Modify activity as needed.
- Click Create or Update as applicable.
| | Calls (Call History) |
- Click Calls and highlight a contact.
- Click on your productivity tool (on right next to Info).
- Modify activity as needed.
- Click Create or Update as applicable.
| | App Home |
- Click on your productivity tool.
- Click on tabs to filter by activity type and time span.
- Hover over an activity, then click the Pencil icon.
- Modify activity as needed.
- Click Create or Update as applicable.
|
|
|
View Activity in Productivity Tool
|
- Hover over a saved activity In-Call, Call History, or App Home screen.
- Click the Pop Out icon (next to the Pencil icon) to view logs.
NOTE: If you updated an activity in your productivity tool, it is not automatically updated in VGIS Desktop. To view these changes, navigate back to the Activity and click on the Pencil icon. The changes are then visible and further edits can be applied, if needed.
|
| Apply a Custom Layout | Your Administrator can customize the view of your activity window with custom layouts. To access:
- Open the Activity window from the In-Call, Call History, or App Home screen.
- Click Layout (next to Create / Update) if available.
|
Troubleshoot Issues
| Issue | Action |
| Sign In / |
- Ensure you entered the correct credentials.
- Contact your Administrator to confirm you are licensed and set up correctly if unsuccessful.
|
| Unable to search contacts, and your account has approximately one million or more CRM contacts | Contact your Administrator. |
